To protect my TrueNas Scale installation from power outage, I bought a UPS. I had a good deal on Huawei UPS2000G, and considering that it’s an online UPS it was a no-brainer for me. However, with all it’s advantages, it has some drawbacks:
- Pretty loud fans, which doesn’t make it a good fit for home
- Limited support by NUT
Network UPS Tools and limited support in my case means that I had to compile drivers and nut-server.
Overall, always check Hardware compatibility list before buying UPS.
Anyway, I’ve managed it to work, but this was not an easy task. TrueNas Scale documentation is sparse and in some way misleading.
In this post I’ll show how you can compile drivers and connect your UPS to TrueNas Scale.
Huge shout out to this blog post which helped me a lot. It’s in Chinese, but with google translate this is not an issue.
Connecting UPS to the TrueNas Scale
That’s the easiest part. Just connect UPS to the USB and make sure that it’s visible in the logs:
root@truenas ~# dmesg | grep converter
[    6.196754] xr_serial 7-1:1.0: xr_serial converter detected
[    6.202646] usb 7-1: xr_serial converter now attached to ttyUSB0
As you can see, my UPS2000G is now connected to the ttyUSB0 port and can
be accessed via /dev/ttyUSB0. We will use this information later.
Compiling NUT driver from source
As I already mentioned, even though NUT supports Huawei UPS2000G, it’s driver is not enabled by default. You have to compile NUT with those driver enabled. To do this:
-
Install Truetool, which is a collection of useful bash scripts for the TrueNas Scale.
-
Enable apt using Truetool
./truetool --apt-enable- Install dependencies
apt install nut-modbus libmodbus-dev libusb-dev- Clone NUT git repo
git clone https://github.com/networkupstools/nut.git --depth=1
cd nut- Run autogen to generate files
Please notice that in my TrueNas Scale version Bluefin-BETA kernel 5.15.62
required tools(AutoConf,etc) were already installed. You might need to install
them.
./autogen.shAfter successfull generation, you should see configure and Makefile:
root@truenas ~/g/nut (master) [1]# ls -ld configure
-rwxr-xr-x 1 root root 1276481 Nov 14 09:58 configure*
root@truenas ~/g/nut (master) [127]# ls -ld Makefile
-rw-r--r-- 1 root root 50881 Nov 14 10:49 Makefile- Configure compilation options
Since TrueNas Scale uses Debian under the hood, we need to use Debian paths for config/systemd files:
./configure --with-modbus \
    --with-user=nut --with-group=nut \
    --datadir=/usr/share/nut \
    --sysconfdir=/etc/nut \
    --includedir=/usr/include \
    --with-statepath=/run/nut \
    --with-pidpath=/run/nut \
    --with-altpidpath=/run/nut \
    --with-drvpath=/lib/nut \
    --with-udev-dir=/lib/udev \
    --with-systemdsystemunitdir=/lib/systemd/system \
--with-systemdshutdowndir=/lib/systemd/system-shutdown- Compile
huawei-ups2000driver
We don’t need to compile all the NUT components, we’ll just compile the driver:
cd include
make
cd ../common/
make
cd ../drivers/
cd drivers
make huawei-ups2000- Copy compiled driver to the
/lib/nut/ The idea here is that we will use NUT installed by the system, and just add our driver there:
cp huawei-ups2000 /lib/nutMake new driver visible to the TrueNas
List of supported by NUT UPSes are kept the /usr/share/nut/driver.list.
Normally, you would just copy generated during compilation list to /usr/share/nut/driver.
But unfortunately, this will not make Huawei UPS2000G visible to the TrueNas
Scale. I’ve spend couple hours trying to understand why it’s not working
and as it turns out, TrueNas Middleware has RegExp which doesn’t match our
entry.
So to fix this, just add a slightly modified entry to /usr/share/nut/driver:
"Huawei" "ups" "3" "UPS2000-G and UPS2000-A series" "" "huawei-ups2000"And restart TrueNas Scale middleware:
systemctl restart middlewaredAfter restart, you should see Huawei UPS2000G in the
System Settings->Services->UPS
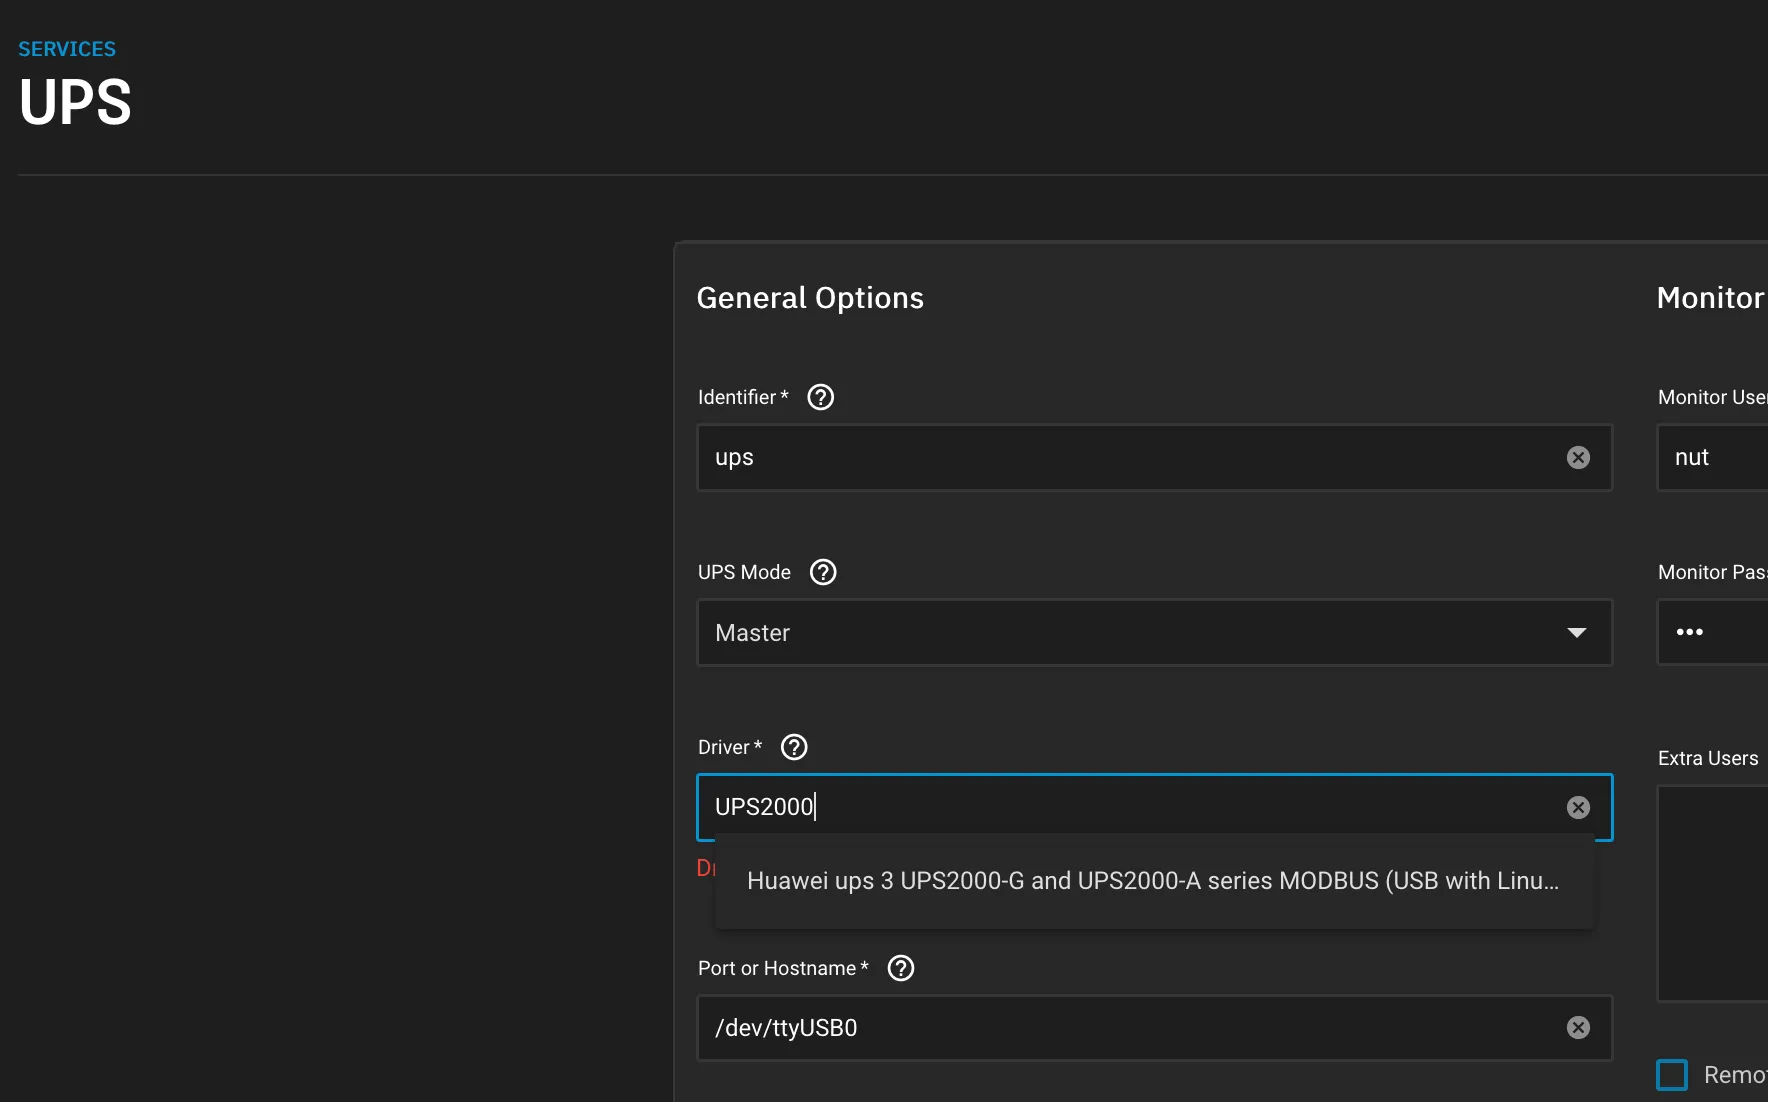
Configure UPS service
We want to configure our UPS through the web interface. This way,
TrueNas Scale will generate all the NUT config files for us. Go to the
System Settings->Services->UPS, and pick:
- driver -
Huawei ups 3 UPS2000-G and UPS2000-A series MODBUS (USB with Linux 5.12+, or Serial RS-232) (huawei-ups2000) - port -
/dev/ttyUSB0 - User -
nut
For me, setting port to /dev/ttyUSB0 didn’t work through the web interface,
so I had to do it in the CLI:
midclt call ups.update '{"port": "/dev/ttyUSB0"}'If everything configured correctly, you can save the settings and start UPS service.
Checking that UPS is connected properly
To check that your UPS is visible by the TrueNas and is working properly:
- Check that NUT services are up and running:
systemctl status nut-server nut-client nut-driver- Check out which port is used by the UPSD service: UPSD is responsible for serving the data from the drivers to the clients. It connects to each driver and maintains a local cache of the current state. Config for the UPSD is generated by the TrueNas Scale middleware. For me, UPSD listens on the port 3494:
cat /etc/nut/upsd.conf
LISTEN 127.0.0.1 3494
LISTEN ::1 3494- Connect to UPS UPSC is provided as a quick way to poll the status of a UPS server. Make sure that you’re using correct port:
root@truenas ~/g/n/common (master)# upsc ups@127.0.0.1:3494
Init SSL without certificate database
battery.capacity: 9
battery.charge: 100.0
battery.charger.status: charging
battery.packs: 2
battery.runtime: 27000
battery.voltage: 27.3
device.mfr: Huawei
device.model: UPS2000G
device.serial: 2102290606HGMA001171
device.type: ups
driver.name: huawei-ups2000
driver.parameter.pollinterval: 2
driver.parameter.port: /dev/ttyUSB0
driver.parameter.synchronous: auto
driver.version: 2.8.0-Windows-86-ga43b966ba
driver.version.internal: 0.03
input.bypass.frequency: 50.0
input.bypass.voltage: 237.1
input.frequency: 50.0
input.voltage: 237.1
output.current: 0.0
output.frequency: 50.0
output.power: 100.0
output.realpower: 0.0
output.voltage: 237.1
ups.beeper.status: enabled
ups.delay.reboot: 60
ups.delay.shutdown: 60
ups.delay.start: 60
ups.firmware: V2R1C1SPC50
ups.firmware.aux: P1.0-D1.0
ups.load: 17.0
ups.mfr: Huawei
ups.model: UPS2000G
ups.power.nominal: 1000
ups.serial: 2102290606HGMA001171
ups.status: OL ECO CHRG
ups.temperature: 27.2
ups.timer.reboot: -1
ups.timer.shutdown: -1
ups.timer.start: -1
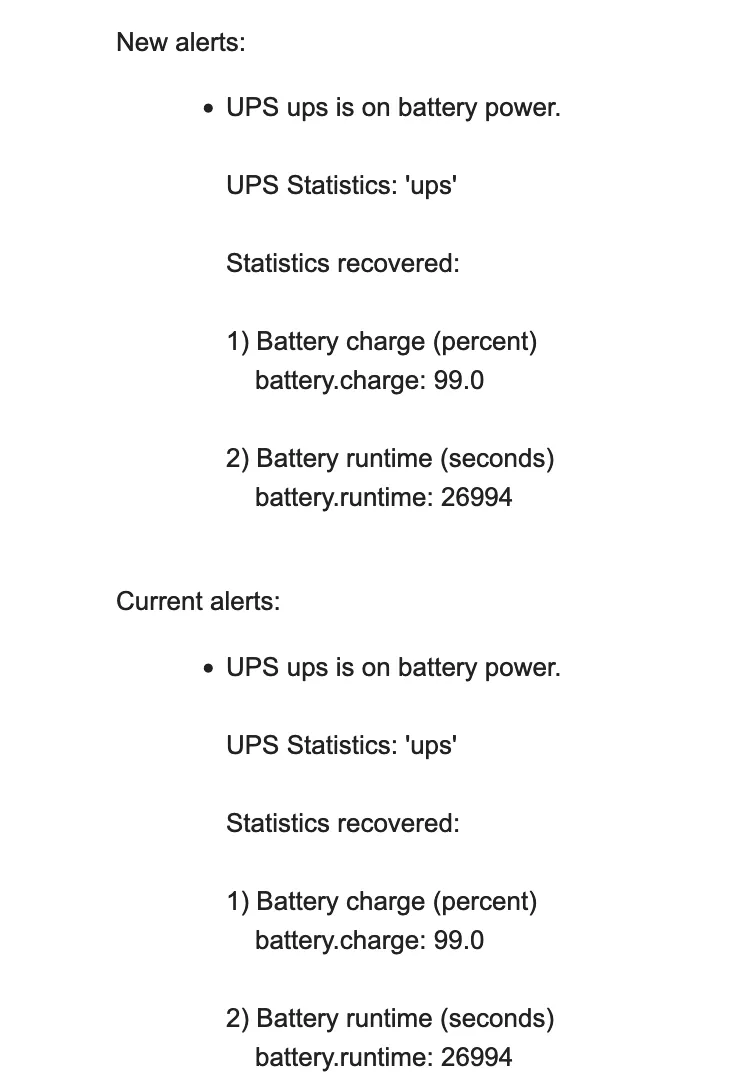
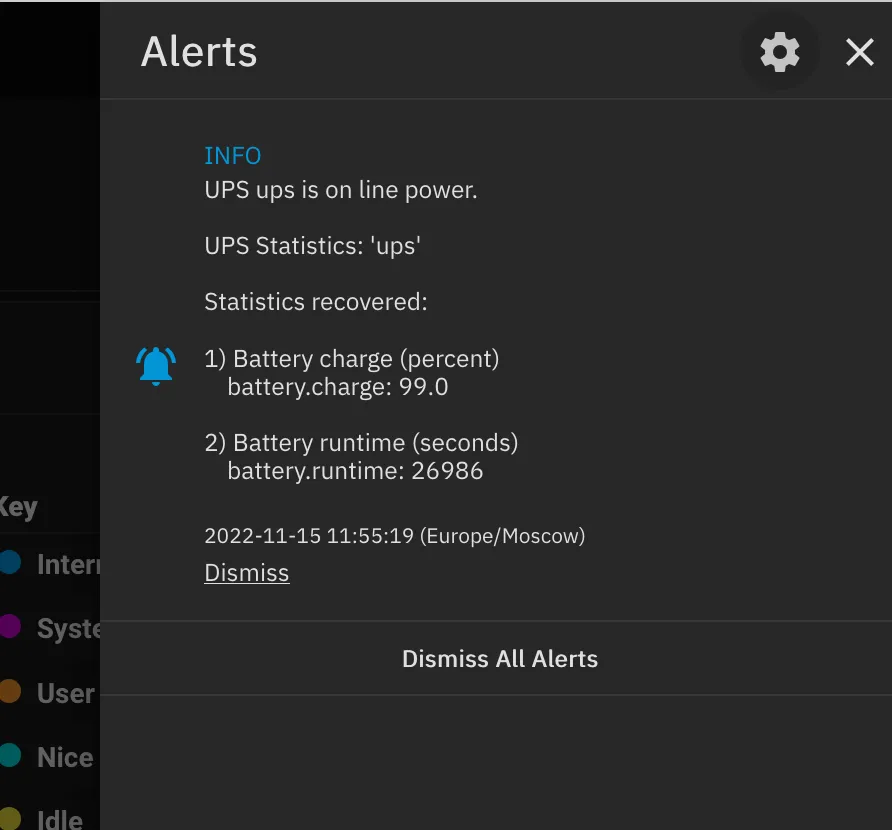
ups.type: onlineNow, when the power goes out, you will receive alerts in the UI:
Or via email(if configured):